

Step 1: Brainstorm
Step 2: Create a Template
First, decide which program you're going to use to create your coupons. I used iWork Pages. If you're using Microsoft, you can use Word or PowerPoint. If you use Word, be sure to use a Blank Publishing Layout.
 |
For Pages or Word: I created a simple 3 x 2 table. Each section of the table will be a coupon.
For PowerPoint: You won't need a template. Just make one coupon per slide, duplicate it, and print as a handout to get several on a page.
|
Step 3: Design the Coupon
Get creative and format your coupon! Decide which images you want on the coupon and what you want it to say. Also, decide where each of these elements will be placed. There are plenty of images and fonts around the internet to give you the look you want!
 |
| You can also format the table borders if you're using Pages (or Word) for an uniform look for all of your coupons. I chose to add a set of paw prints in the upper left corner of all my coupons for uniformity. |
Step 4: Duplicate the Coupon
This next step allows you to print multiple coupons on a single sheet. The process varies a bit depending on the software you're using.
 |
| Command+click each of the images and text boxes. |
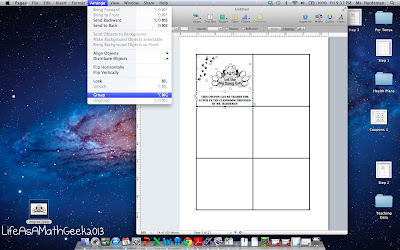 |
| Click Arrange > Group. |
 |
| Now, each of the elements has been grouped as one item.... |
 |
| ...and can be copied (Command+C) and pasted (Command+V) into the other boxes on the template! |
For Word: Command+click (shift+click for PC users) each of the images and text boxes. Option+click (right click) to bring up the options menu, then choose Group under the grouping option. Now, each of the elements has been grouped as one item and can be copied and pasted into the other boxes on the template.
For PowerPoint: Duplicate the slide to depending on how many coupons you want on a page. For example, I want to print four coupons on a page. I'd duplicate the slide 3 times, for a total of four identical coupons. When I print them, I'd choose the Handouts (4 slides per page) option.
Step 5: Repeat
Now you're ready to create another coupon. For Pages and Word, you can follow steps 2-4 again with a few minor short cuts.
 |
| I copied and pasted the original template from Step 2. Then, I copied and pasted one of the coupons I'd already made into the new template. I ungrouped that coupon. |
 |
| Next, I quickly changed the text and picture to create a new coupon. |
 |
| Then, I regrouped the images and copied/pasted the coupon into the other boxes on the page. It sounds like a lot, but it definitely gets easier once you get the hang of it. For PowerPoint: Just repeat steps 2-4. |
Step 5: Print and Enjoy
I'm printing mine on red paper to match the classroom theme. I suggest laminating them for durability. I hope this has been useful. If you have any questions, feel free to ask them in the comments section!
This comment has been removed by the author.
ReplyDeleteOops, I replied on the wrong post.
DeleteJill